
TUTORIAL 02 + 03 - 2.5D ANIMATION
Within tutorial 02 we created 2.5D image using after effects. This was created through the same way the initial tutorial one animation was but with all layers converted into 3d space within after effects.
This allows a huge amount of flexibility and allows you to move layers, the camera, the focus point and other aspects to create a 3 dimensional scene from a 2d image.
As with the first tutorial the image was cut up in photoshop but here the layers had to be adapted. The layers needed to be increased but not in size, in content. Each layer was adapted to 'fake' the rest of it, be it hidden in front or to the side.
The set work was to create our own animation in 2.5D. Please see the Abandoned Warehouse animation below that was created using this technique. The use of additional layers to the photograph were added and the movements of all elements were pre-ordained and in order to add emphasis to the dark, sinister nature of the image/animation.
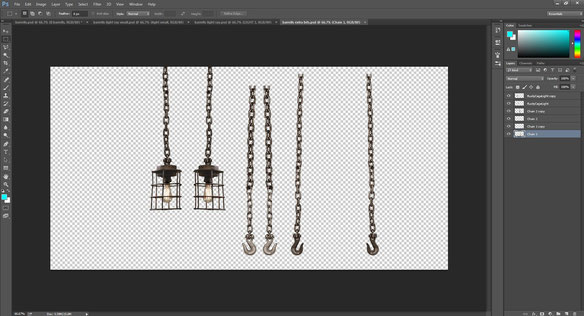
Screenshot 01:
This shows the initial layer set up of the image. More were added within after effects including external images for transformations and transitions. The lights and other objects were added for scene adjustment.

Screenshot 02:
This shows the Extra layers, excluding numerous light filters and glow effects. All these elements were animated within after effects and ordered in 3d space.
Screenshot 03:
The scene in 3d space. This image shows the effects caused by changing focus ranges and apertures.

Screenshot 04:
The scene in 3d, this shows the elements ordered behind one another. All elements were scaled up to create an illusion of them being close together.

Screenshot 05:
This shows the way in which particle effects were added to create dust illusions, both playing with the focus and size of the elements and allowing them to disappear in 3d space behind other objects.
